 EN

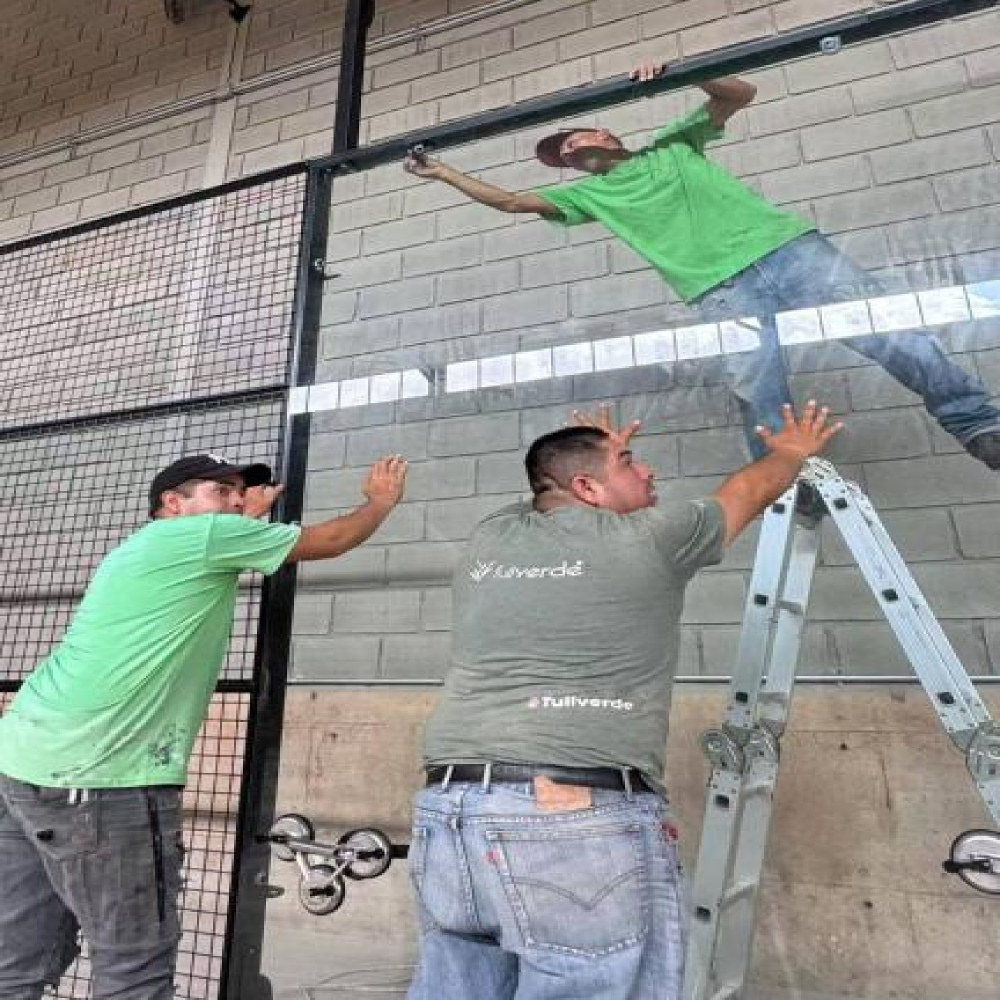
A Padel Court installation starts before the container arrives. The foundation, access route, unloading plan, component list, electrical work and local installation team all affect whether the court can be assembled without avoidable delays.
The exact sequence depends on the selected court model and the project scope. A supplier should provide the applicable installation and foundation drawings during technical confirmation. The local contractor or engineer then checks those documents against the site and local requirements. SSTD's sales team can discuss the project information with the customer and provide the documents for the selected model; the customer does not need to prepare a complete technical package before making contact.
This guide explains the usual workflow for importers, contractors, club investors and facility operators. It does not replace the installation documents for a specific model or the review of a local qualified professional.
Who is responsible for Padel Court installation?
Installation responsibility should be written into the quotation before the order is placed. A court supplier may provide components, packing information, drawings, an installation manual or technical support. A local contractor may handle the foundation, unloading, assembly, electrical work and site finishing. These are different scopes.
|
Work area |
Usually discussed with the supplier |
Usually arranged locally |
|
Court model and configuration |
Model, quantity, options and bill of materials |
Confirmed by the buyer for the project |
|
Foundation interface |
Applicable foundation and anchor information |
Site review, design approval and construction |
|
Delivery and unloading |
Packing list, package information and agreed delivery scope |
Access, forklift or lifting equipment, labour and temporary storage |
|
Court assembly |
Installation drawings, manual and agreed technical support |
Local installation team unless on-site service is quoted |
|
Lighting |
Court lighting components and connection information |
Power supply, wiring, distribution and electrical installation |
|
Inspection |
Approved configuration and agreed acceptance points |
Site readiness, assembly checks and local compliance |
The final division depends on the quotation. SSTD's import guidance separates the equipment package from foundation, unloading, installation and electrical work unless the quotation expressly includes those services.[5]
Step 1: Confirm the model and project scope
Before any site work begins, record the exact court model and configuration. Do not start with a product photograph alone. Panoramic and classic courts can use different structural layouts, enclosure arrangements and fixing positions. SSTD presents several Padel Court configurations in its product range, so the model reference should appear in the quotation and technical documents.[2]
Confirm at least:
- selected court model and quantity;
- indoor or outdoor installation;
- court colour and branding;
- glass, mesh, turf and lighting scope;
- door arrangement and accessories;
- roof or canopy requirements;
- delivery destination and access conditions;
- installation responsibility;
- required foundation and installation drawings;
- inspection and handover expectations.
A clear scope prevents a common installation problem: the site is prepared for one arrangement while the delivered components follow another.
Step 2: Review the foundation and site before construction
The foundation must match the selected court. The International Padel Federation rules define the interior playing court as 10 metres by 20 metres and require the playing surface to avoid water accumulation.[1] These playing dimensions do not by themselves define the complete construction footprint, foundation detail or anchor layout.
Before construction, the local engineer or contractor should review:
- the model-specific foundation drawing;
- finished levels and available edge space;
- anchor or fixing positions;
- existing slab condition if the project will reuse one;
- soil, settlement and drainage conditions;
- access for the delivery vehicle and lifting equipment;
- lighting cable routes and local power arrangements;
- roof or canopy foundations if included.
The previous SSTD foundation guide explains why a generic drawing should not be used for every model and why the matching foundation and installation documents should be reviewed before concrete work begins.[6]
Do not pour the foundation before the court model and applicable technical documents are identified. A late change to anchor positions or finished levels can affect both the civil work and the assembly schedule.
Step 3: Prepare access, storage and unloading
A Padel Court arrives as packaged components rather than as one assembled object. Steel members, glass, mesh, turf, lighting and accessories may be packed separately. The receiving team needs the packing list before the container or truck reaches the site.
Plan the following points:
- vehicle access from the public road to the unloading area;
- clearance for the container, truck and lifting equipment;
- a safe place to open packages and inspect components;
- temporary storage if the foundation or installation team is not ready;
- protection from rain, impact and contamination;
- lifting points and package weights supplied with the shipment;
- a method for keeping glass and electrical items secure;
- a record of package numbers and visible damage.
The site does not need to be fully finished, but it must be ready for the type of delivery and handling required by the shipment. Do not schedule unloading before confirming who supplies the forklift, telehandler, crane or labour.
Step 4: Check the shipment before assembly
Inspect the shipment before discarding packaging. Compare the delivered components with the approved bill of materials and packing list. Photograph damaged packaging and record shortages immediately.
Check, where applicable:
- model and quantity;
- columns, beams, posts and connection parts;
- glass panels and protective packing;
- mesh panels, doors and hardware;
- turf, lines and laying materials;
- net, posts, brackets, anchors and fasteners;
- lighting units and agreed accessories;
- installation drawings, manuals and spare parts;
- package marks and component identification.
SSTD's import guide recommends keeping package numbers, condition records, photographs and shortage information as part of the receiving process.[5] A pre-shipment check can reduce risk, but it does not remove the need to inspect the goods when they arrive.
Step 5: Set out the court and verify the base
After the foundation is ready and the shipment has been checked, the installation team can set out the court according to the approved drawings. Before fixing the structure, verify the reference lines, court orientation, finished level and anchor positions.
The team should confirm:
- the base is clean and ready for installation;
- the court position agrees with the approved layout;
- anchor points match the selected model;
- drainage and surrounding finished levels are not blocked;
- access doors will operate within the available space;
- the structure will not conflict with drains, walls, columns or other site features.
If the base does not match the drawings, stop and resolve the difference with the supplier and local technical team. Forcing components into an incorrect layout can create alignment, glass-fitting or door-operation problems later.
Step 6: Assemble the structure and enclosure
The exact order of assembly follows the selected model's installation information. In general, the team positions and fixes the main structural members, checks alignment, installs the enclosure components and then fits the glass, doors and accessories.
The installation team should keep the following under control:
- correct component identification;
- connection and fastener locations;
- vertical and horizontal alignment;
- protection of coated surfaces during handling;
- safe lifting and positioning of glass;
- door clearance and hardware operation;
- mesh and panel alignment;
- access to fasteners that may need later inspection.
Glass requires controlled handling and suitable protection. The local team should use the handling method and safety practices appropriate for the delivered panels. The supplier's model documents and the local contractor's risk controls take priority over a generic online installation sequence.
Step 7: Install turf, net and accessories
Once the structure and enclosure are ready, the team installs the court surface and playing accessories according to the approved configuration. The base must be clean and suitable before turf work begins.
Check:
- turf orientation and fit;
- court lines and playing-area layout;
- seams, edges and transitions;
- net posts and net position;
- doors, locks and handles;
- protective components and covers;
- removal of packaging and construction debris.
The final surface should support regular play and avoid water accumulation. The FIP rules include requirements for court dimensions, surfaces, enclosures and playing conditions, while the selected product documents and local rules determine the project-specific installation details.[1]
Step 8: Complete lighting and electrical work
Lighting equipment supplied with a court is not the same as a complete local electrical installation. The quotation should identify which lighting components are included and which work remains at the site.
The local electrical team may need to arrange:
- incoming power supply;
- distribution board and protection;
- field wiring and cable routes;
- earthing or grounding;
- switches, controls and access;
- connection and testing by a qualified electrician;
- compliance with local electrical requirements.
The lighting layout should be checked against the court structure and any roof or ceiling. Fixtures should not obstruct the required playing space. The FIP rules specify minimum unobstructed height and different lighting levels for different uses, so the owner should match the design to the intended application and applicable requirements.[1]
Step 9: Carry out the installation inspection
Before handover, inspect the court against the approved configuration, drawings and agreed acceptance points. The inspection should be recorded rather than treated as an informal visual check.
|
Inspection area |
What to check |
|
Layout |
Court position, orientation, dimensions and access |
|
Foundation interface |
Fixing positions, stability, finished levels and drainage |
|
Structure |
Alignment, connections, surface condition and visible damage |
|
Glass and enclosure |
Panel condition, installation, mesh, doors and hardware |
|
Playing surface |
Turf fit, lines, seams, net and surrounding finish |
|
Lighting |
Fixtures, wiring, controls, operation and local electrical sign-off |
|
Safety |
Edges, doors, glass, access routes and construction debris |
|
Documents |
Packing record, drawings, manual, maintenance information and open items |
The required checks vary by project. A buyer should agree them with the supplier and local contractor before installation, especially when a tender, club opening date or third-party inspection is involved.
Step 10: Complete handover and maintenance records
Handover should include the documents and information agreed in the quotation. Depending on the project, this may include the final component list, installation instructions, maintenance information, electrical records, inspection photographs and a list of outstanding items.
The owner should also record:
- the court model and configuration;
- installation date and location;
- supplier and local contractor contacts;
- lighting information;
- replacement parts and fasteners;
- cleaning and turf-care instructions;
- any agreed warranty or after-sales route;
- unresolved work with an assigned owner and deadline.
The handover file helps the operator manage later maintenance and helps the supplier identify the correct components if replacement parts are needed.
Common Padel Court installation mistakes
Preparing the foundation from a generic drawing
Use the foundation and installation documents for the selected model. Different layouts may not use the same fixing positions.[6]
Treating delivery as installation
A container delivered to the site does not mean the court has been unloaded, assembled, connected and accepted. Separate each responsibility in the quotation.
Opening the shipment without a receiving record
Record package numbers, damage and shortages before components are moved or packaging is discarded.[5]
Leaving unloading equipment until the truck arrives
Glass and structural components may need mechanical handling. Confirm access, lifting equipment and labour in advance.
Connecting lights without a local electrical review
The court lighting package does not automatically include the site's power supply, wiring, protection or electrical sign-off.
Installing turf before the base and drainage are ready
Surface work should follow the approved foundation, finished levels and drainage plan. Correcting the base after turf installation creates avoidable rework.
Starting assembly with unresolved model changes
If the buyer changes the court type, doors, colour, roof or lighting after production, update the documents and site plan before assembly starts.
FAQ
How long does it take to install a Padel Court?
There is no single schedule for every project. The time depends on foundation readiness, court model, quantity, access, unloading, local labour, electrical work and site conditions. Ask the supplier and local contractor for a project-specific schedule after the model and scope are confirmed.
Can a local contractor install a Padel Court?
A local contractor may handle foundation work, unloading, assembly, electrical connections and site finishing when the team has the required skills and equipment. The quotation should state whether SSTD provides installation, instructions, remote technical support or another arrangement.
Does SSTD provide installation instructions?
The applicable installation information can be discussed and provided for the selected model during technical confirmation. The customer should review it with the local installation team before assembly begins.
Does the Padel Court price include installation?
The reference equipment-package price does not automatically include local foundation, unloading, installation or electrical work. SSTD's published pricing guide separates these destination-specific costs unless the quotation states otherwise.[7]
What should I do if components are missing or damaged?
Photograph the packaging and affected components, record the package number and compare the shipment with the packing list. Notify the relevant supplier, carrier or insurer promptly and keep the receiving record.[5]
Does a roofed Padel Court use the same installation process?
Not necessarily. A roof or canopy introduces additional structural, foundation, drainage, access and electrical considerations. It should be included in the project scope from the beginning and reviewed with the applicable local technical team.
What information should I send SSTD before requesting an installation plan?
Send the country and city, number of courts, selected model or reference image, site dimensions and photos, indoor or outdoor conditions, existing foundation information, roof requirements, delivery access and the intended installation arrangement. SSTD's sales team can then discuss the project and identify the relevant technical documents.
Request a project-specific Padel Court installation plan
Before production or foundation work starts, contact SSTD with the project location, quantity, selected model, site photos and dimensions, indoor or outdoor conditions, roof requirements, access information and the preferred installation arrangement.
The sales team can discuss the scope with you and provide the foundation and installation information that matches the selected model. Review those documents with the local engineer or contractor, prepare the site, inspect the shipment and record the final handover checks.
View the SSTD Padel Court range[2], review SSTD project cases[3], and contact the team through the SSTD contact page[4]. For related guidance, read What Foundation Does a Padel Court Need?, How to Import Padel Courts from China, and How Much Does a Padel Court Cost in 2026?.
Sources
[1] International Padel Federation, Regulations of the Padel Game.
[2] SSTD, Padel Court product range.
[3] SSTD, Project cases.
[4] SSTD, Contact Us.
[5] SSTD, How to Import Padel Courts from China: A Step-by-Step Guide.
[6] SSTD, What Foundation Does a Padel Court Need?.
[7] SSTD, How Much Does a Padel Court Cost in 2026?.
This article is a procurement and project-planning guide. Final installation, foundation, electrical, safety and acceptance work must follow the selected model documents, the actual site and the requirements of the applicable jurisdiction.
Table of Contents
- Who is responsible for Padel Court installation?
- Step 1: Confirm the model and project scope
- Step 2: Review the foundation and site before construction
- Step 3: Prepare access, storage and unloading
- Step 4: Check the shipment before assembly
- Step 5: Set out the court and verify the base
- Step 6: Assemble the structure and enclosure
- Step 7: Install turf, net and accessories
- Step 8: Complete lighting and electrical work
- Step 9: Carry out the installation inspection
- Step 10: Complete handover and maintenance records
-
Common Padel Court installation mistakes
- Preparing the foundation from a generic drawing
- Treating delivery as installation
- Opening the shipment without a receiving record
- Leaving unloading equipment until the truck arrives
- Connecting lights without a local electrical review
- Installing turf before the base and drainage are ready
- Starting assembly with unresolved model changes
-
FAQ
- How long does it take to install a Padel Court?
- Can a local contractor install a Padel Court?
- Does SSTD provide installation instructions?
- Does the Padel Court price include installation?
- What should I do if components are missing or damaged?
- Does a roofed Padel Court use the same installation process?
- What information should I send SSTD before requesting an installation plan?
- Request a project-specific Padel Court installation plan
- Sources